
Battery charger warranty claims can become one of the most expensive problems for distributors, importers, and manufacturers. A product may perform well during development and initial launch, yet warranty returns can increase months later as chargers are exposed to different batteries, temperatures, operating cycles, input conditions, and user behaviors.
The difficult part is that a customer reporting “the charger does not work” does not necessarily mean the charger is defective. The battery, power source, fuse, cable, charging mode, connection, or user instructions can all produce similar symptoms.
For suppliers, replacing every returned unit without investigating the actual cause can hide recurring engineering problems. It also creates unnecessary warranty costs and prevents the manufacturer from learning why failures are occurring in the field.
A professional warranty process therefore needs to go further than replacement. The objective should be to identify the real failure, verify its root cause, implement a permanent corrective action, validate the solution, and then measure whether the failure rate actually falls in subsequent production.
This approach is becoming increasingly important as modern battery chargers combine power electronics, control software, temperature monitoring, protection circuits, current sensing, charging algorithms, and multiple operating modes. A field failure may therefore originate from hardware, firmware, manufacturing, application conditions, or an interaction between several of them.
Why Battery Charger Warranty Claims Rise After a Successful Launch
A successful product launch does not automatically prove long-term reliability. Development samples are normally tested under controlled conditions, while production chargers eventually operate across a much wider range of real-world conditions.
As sales volume grows, chargers may encounter higher ambient temperatures, repeated charging cycles, older batteries, longer operating periods, transportation vibration, unstable input power, and different user practices. Small weaknesses that remained invisible during initial testing can then become recurring warranty problems.
One common example is a component substitution after product approval. A capacitor, MOSFET, diode, connector, sensor, or other component may be replaced because of availability or supply-chain constraints. Even when the replacement appears electrically similar, differences in temperature rating, tolerance, switching characteristics, mechanical construction, or long-term reliability can affect the finished product.
Thermal design is another frequent source of delayed failures. A charger can pass a short functional test but experience excessive heat after several consecutive charging cycles. Insufficient heatsinking, restricted airflow, undersized components, or high resistance in cables and connections can gradually push the system beyond its intended operating margin.
Common Reasons Claims Appear Months Later
| Initial Weakness | What May Remain Hidden | Typical Warranty Symptom | Investigation Area |
|---|---|---|---|
| Limited thermal testing | Heat accumulation during repeated cycles | Overheating or shutdown | Thermal design |
| Uncontrolled component substitution | Different electrical or thermal behavior | Premature failure | Supply-chain and engineering control |
| Short cable validation | Contact resistance and mechanical wear | Intermittent charging or hot connections | Cable and clamp design |
| Limited firmware testing | Unusual battery conditions | False fault or unexpected shutdown | Software and control logic |
| Insufficient aging testing | Early-life defects | DOA or early failure | Production testing |
These patterns are consistent with the need for reliability and durability testing that goes beyond basic functional verification. UL Solutions, for example, describes reliability and durability testing as a way to assess expected and unusual use conditions and identify design flaws that can affect product reliability.
Not Every “No Charge” Complaint Is a Charger Failure
One of the biggest mistakes in warranty management is treating the customer’s symptom as the engineering diagnosis.
A customer may say that the charger does not charge, but the actual cause could be a damaged or deeply discharged battery, incorrect battery chemistry selection, reverse polarity, a blown fuse, low input voltage, a poor connection, or a battery that simply cannot accept the expected charging current.
This distinction is extremely important. If every complaint is automatically classified as a defective charger, the supplier receives inaccurate failure data. Engineering teams may then spend time redesigning a product that is actually operating correctly.
Before confirming a hardware failure, the returned charger should ideally be tested using a known-good power source, suitable battery, correct charging mode, and appropriate cables and connections.
| Customer Report | Possible Cause Outside the Charger | Verification |
|---|---|---|
| No charging | Damaged or sulfated battery | Test with a known-good battery |
| No charging | Incorrect charging mode | Verify battery type and selected mode |
| No charging | Reverse polarity or blown fuse | Inspect polarity and protection devices |
| No charging | Low input voltage | Measure voltage at the charger input |
| Stops early | Battery cannot accept current normally | Test battery behavior independently |
| Unexpected indicator | User-interface or instruction problem | Compare behavior with product documentation |
How to Triage a Battery Charger Warranty Claim
A good warranty process should use a simple and repeatable triage procedure. The purpose is to determine whether the claim is a confirmed hardware failure, battery-related problem, input-power issue, user error, installation problem, or no-fault-found return.
1. Identify the Product
Record the model number, serial number, production date code, firmware version where applicable, and production batch. Traceability becomes especially important when several complaints begin showing the same symptom.
2. Record the Customer’s Exact Symptom
Do not immediately translate “not charging” into “charger defective.” Record the actual behavior: no output, intermittent output, overheating, early shutdown, abnormal noise, incorrect indicator, damaged cable, blown fuse, or another specific symptom.
3. Reproduce the Failure
Test the returned charger under controlled conditions. Use known-good equipment wherever possible. If the charger operates normally after the original battery or power source is removed from the equation, the claim may require a different classification.
4. Assign Two Codes
Separate the customer symptom from the engineering root cause. For example, “charger stops charging” can be the symptom while the confirmed root cause may be an incorrect thermal threshold, damaged connector, firmware condition, or battery-related issue.
Common Battery Charger Failures and Their Root Causes
When a charger is genuinely defective, certain failure patterns appear repeatedly. The symptom provides an important starting point, but the actual root cause still needs to be verified through testing.
| Symptom | Potential Root Causes | Primary Investigation Area |
|---|---|---|
| Intermittent charging | Weak solder joints, loose connectors, cracked vias or thermal cycling | PCB and mechanical assembly |
| Low or unstable output | Current-sensing error, thermal fold-back or firmware limitation | Power stage and calibration |
| Excessive heat | Undersized components, poor heatsinking, airflow or contact resistance | Thermal and electrical design |
| Unexpected shutdown | Temperature thresholds, software timeout or protection sensitivity | Firmware and protection |
| Wrong charging mode | Detection thresholds or control-interface problems | Firmware and user interface |
| Fuse failure | External short, surge or unsuitable fuse selection | Protection coordination |
| Hot cable or clamp | Small conductor, weak crimp, corrosion or low contact force | Output accessories |
| Display or button failure | Moisture, switch failure or connector problem | User interface |
Thermal Failures Should Be Investigated Carefully
Heat is a critical reliability factor in power electronics. Components that remain within specification during a short test can experience significantly greater stress during repeated operation.
Suppliers should therefore evaluate the complete charger at realistic loads rather than relying only on individual component ratings. Temperature rise should be measured at rated output, during repeated cycles, and under relevant ambient conditions.
Connections deserve particular attention. Cable crimps, clamps, connectors, and terminals can create localized heating when their electrical resistance is higher than intended. This is why cable quality should be evaluated through measurable voltage-drop and temperature-rise performance rather than visual inspection alone.
Depending on the confirmed cause, a corrective action may involve improved heatsinking, revised airflow, larger conductors, higher-rated components, better crimps, improved connectors, PCB layout changes, or revised protection thresholds.
What Suppliers Should Change After a Confirmed Failure
Replacing a failed charger is a customer-service action. It is not necessarily a corrective action.
If a failure is recurring, the supplier should determine whether the problem originates in product design, component selection, firmware, manufacturing, incoming materials, supplier changes, assembly procedures, or insufficient validation.
- Increase electrical and thermal design margins.
- Validate power components under worst-case conditions.
- Improve heatsinking and thermal paths.
- Review high-current PCB paths and copper capacity.
- Strengthen solder-process controls.
- Specify cables and clamps according to electrical and thermal performance.
- Expand firmware testing around abnormal and boundary battery conditions.
- Control and document production firmware versions.
- Require engineering approval for critical component substitutions.
- Add aging or burn-in testing when early-life failures are significant.
- Verify charging curves and protection functions.
- Maintain production-batch traceability.
Component Substitution Can Create Hidden Warranty Problems
Supply-chain shortages and component availability can force manufacturers to consider alternative parts. However, an apparently equivalent component is not automatically equivalent at system level.
A replacement component can change thermal behavior, switching losses, tolerances, current handling, protection behavior, electromagnetic performance, mechanical reliability, or long-term durability.
Critical substitutions should therefore go through a documented engineering review. Depending on the part and application, the revised design may require electrical, thermal, functional, safety, endurance, or certification-related revalidation.
For battery chargers, the applicable safety standard depends on the product category and intended use. IEC 60335-2-29 covers certain household and similar-use battery chargers, while UL Solutions lists standards such as UL 1012, UL 1236, UL 1310, UL 1564, and IEC 60335-2-29 for different charger applications.
That distinction matters for warranty investigations because a supplier should not treat a critical design or component change as a simple purchasing substitution when it can affect the certified or safety-relevant configuration.
8D and CAPA for Recurring Warranty Problems
When the same warranty issue repeatedly appears, suppliers should move from individual repair decisions to a structured corrective-action process.
8D is widely used as a structured problem-solving methodology for recurring quality issues. A typical process establishes a responsible team, defines the problem, investigates root cause, implements corrective action, and verifies effectiveness. CAPA adds the broader discipline of corrective and preventive action.
For example, supplier corrective-action procedures published by Graco require a complete 8D analysis for certain supplier issues, including root-cause analysis and corrective/preventive action.
A Practical Supplier Corrective-Action Process
- Define the problem: quantify the failure and affected products.
- Contain the issue: identify potentially affected inventory.
- Build the investigation team: include quality, manufacturing and engineering expertise.
- Analyze the evidence: inspect returned units and production records.
- Verify the root cause: reproduce the failure whenever possible.
- Implement corrective action: change the design, process, component, firmware or documentation.
- Validate the correction: test representative corrected units.
- Monitor effectiveness: compare claim rates before and after the change.
A CAPA process should also prevent the same problem from returning through updated specifications, test procedures, supplier controls, training, or preventive measures. This is why structured corrective action is more valuable than simply increasing the number of replacement units shipped to customers.
Why Returned Chargers Should Be Analyzed
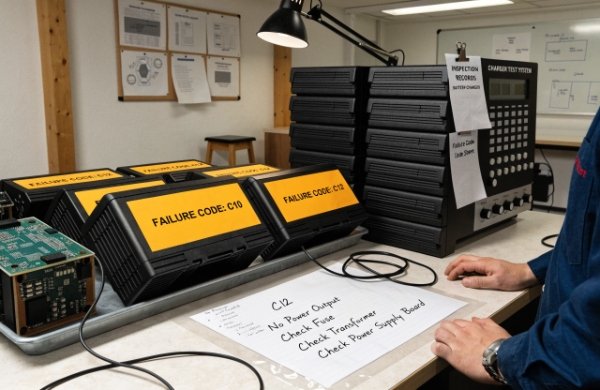
A returned charger is a valuable source of engineering evidence. Physical inspection may reveal burnt components, overheated connectors, damaged solder joints, moisture ingress, mechanical damage, cracked parts, or abnormal wear that cannot be identified from a customer description alone.
Not every returned unit needs the same level of laboratory analysis. However, representative samples from recurring failure categories should be preserved and examined rather than automatically discarded after replacement.
Where the failure cannot be reproduced, the unit should be recorded as no-fault-found rather than being used as evidence of a confirmed hardware defect.
Track Warranty Claims by Production Batch
Total return numbers are useful, but they can hide important trends. A stronger warranty database tracks claims by model, batch, date code, firmware revision, component configuration, customer application, and failure symptom.
Suppose one batch suddenly produces a higher percentage of overheating complaints. The investigation can then focus on changes made during that production period, such as a cable supplier, component lot, assembly process, firmware revision, heatsink specification, or crimping procedure.
The same principle applies to software. If premature shutdowns increase after a firmware update, the software revision should become part of the investigation rather than treating every affected unit as an unrelated hardware failure.
Useful Warranty Metrics
| Metric | Why It Matters |
|---|---|
| Warranty claim rate | Shows the overall field-failure trend |
| Confirmed hardware failure rate | Separates genuine defects from other complaints |
| No-fault-found rate | Identifies triage and application issues |
| Failure rate by batch | Helps identify production-specific problems |
| Failure rate by symptom | Reveals recurring field patterns |
| Post-correction failure rate | Shows whether the supplier fix worked |
| Warranty resolution time | Measures service efficiency |
How Distributors Should Work With Suppliers
Distributors should expect more from a supplier than automatic replacement of defective-looking units. A strong supplier relationship should provide technical escalation, traceability, root-cause analysis, corrective action, and evidence that the corrective action has been validated.
For a recurring issue, four questions are particularly important:
- What exactly failed?
- What evidence confirms the root cause?
- What permanent corrective action was implemented?
- How was the effectiveness of the correction verified?
Distributors should also ask whether existing inventory is affected. Correcting the next production batch does not automatically solve the problem for units already sitting in warehouses or operating in the field.
Building a Closed-Loop Warranty System
The strongest warranty systems connect customer service, distributors, quality teams, engineering, manufacturing, and suppliers through one feedback loop.
Each claim should generate structured information. Confirmed failures should be analyzed, recurring causes should be ranked, and significant issues should trigger formal corrective action.
After a supplier releases a fix, the corrected production population should be tracked separately. The purpose is to determine whether the claim rate actually changed after the corrective action.
| Warranty Stage | Recommended Action |
|---|---|
| Complaint intake | Record the exact customer symptom |
| Initial triage | Check battery, input power, polarity and settings |
| Technical verification | Test the charger under controlled conditions |
| Failure classification | Assign symptom and root-cause codes |
| Trend analysis | Analyze failures by model and batch |
| Supplier escalation | Request evidence-based root-cause analysis |
| Corrective action | Change the design, process, component or firmware |
| Validation | Verify the corrected configuration |
| Effectiveness review | Compare post-fix warranty performance |
Battery Charger Warranty Checklist
- Record the model and serial number.
- Capture the production batch or date code.
- Record the customer’s exact symptom.
- Check the battery before confirming charger failure.
- Verify input voltage and connection quality.
- Check polarity, fuse and charging mode.
- Test returned units under controlled conditions.
- Separate confirmed failures from no-fault-found cases.
- Track failures by production batch.
- Track firmware revisions where applicable.
- Preserve representative failed units for analysis.
- Request verified root-cause analysis for recurring failures.
- Require corrective action for significant repeated defects.
- Control and approve critical component substitutions.
- Validate corrective changes before full production.
- Measure the failure rate after the fix.
Final Thoughts
Battery charger warranty claims should not be viewed simply as a replacement cost. They are a valuable source of information about how a product performs outside the laboratory.
The first step is to determine whether the charger is genuinely defective. Battery condition, input power, fuses, cables, connections, charging modes, and user expectations can all produce symptoms that resemble charger failure.
When a genuine product failure is confirmed, replacing the unit is only the beginning. The supplier needs to identify the root cause, determine whether other production batches are affected, implement a permanent corrective action, validate the revised configuration, and monitor subsequent production.
A closed-loop warranty process built around accurate failure classification, batch traceability, physical failure analysis, 8D or CAPA, and post-correction monitoring gives distributors much better control over recurring claims.
The ultimate goal is not simply to process warranty returns faster. It is to make the next production batch more reliable than the previous one.