Level 2 Home EV Charger Installation Process 2026: Step-by-Step Guide
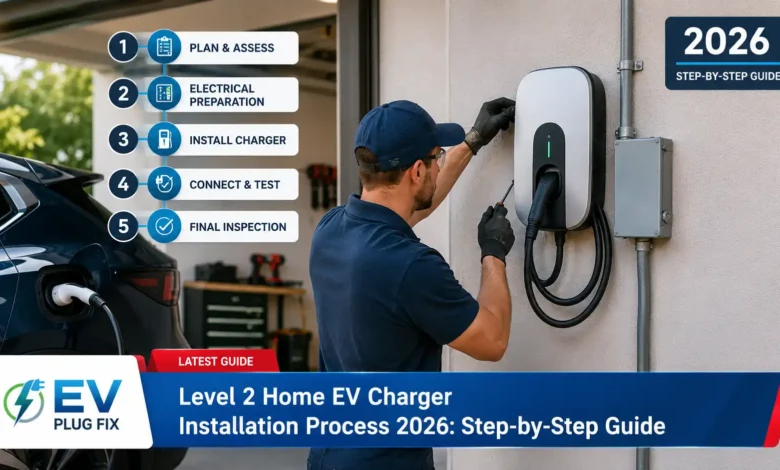
Level 2 Home EV Charger Installation 2026: Your Complete Roadmap to Safe, Fast, and Cost-Effective Charging
⚡ 2026 UPDATE: With EV adoption surging nationwide, electricians are booked weeks in advance and permit wait times have increased in many regions. Starting your Level 2 home EV charger installation process early is more critical than ever.
Level 2 home EV charger installation projects often turn into unexpected nightmares when homeowners overlook critical steps like electrical capacity assessment and permit requirements. What should be a straightforward upgrade transforms into a weeks-long ordeal with ballooning costs and safety hazards.
Successful Level 2 home EV charger installation in 2026 demands a systematic approach: thorough electrical evaluation, proper charger selection, securing permits, professional wiring and mounting, and comprehensive testing. Most installations deliver 25-60 miles of range per hour when executed correctly, with total project timelines ranging from one to four weeks.
As someone who has overseen hundreds of EV charger installations across diverse home configurations, I’ve witnessed firsthand how proper planning separates smooth projects from costly disasters. This guide walks you through every critical stage of the Level 2 home EV charger installation process.
The Hidden Complexity of Home EV Charger Installation That Catches Most Homeowners Off Guard
You see sleek EV charger advertisements promising plug-and-play convenience. The reality of Level 2 home EV charger installation involves far more than hanging a box on your wall. Understanding these challenges upfront transforms your experience from frustrating to seamless.
Homeowners consistently underestimate four key factors during Level 2 EV charger installation: existing electrical panel capacity limitations, municipal permit requirements and timelines, specialized electrician availability, and optimal charger placement for daily convenience. Each factor can add $1,500 or more to your project and extend timelines by weeks.
“The biggest surprise for most homeowners isn’t the equipment cost—it’s discovering their 100-amp panel needs a $2,000 upgrade before they can even think about Level 2 charging speeds.”
Electrical panel assessment is non-negotiable. A licensed electrician must evaluate your home’s service capacity, breaker slot availability, and existing wiring condition. Level 2 chargers demand a dedicated 240-volt circuit pulling 30-50 amps—a significant load that older 100-amp panels typically cannot support. Without this pre-installation evaluation, you risk purchasing incompatible equipment or facing dangerous electrical conditions.
Municipal permitting adds another layer often overlooked. Local building departments nearly always require permits for electrical modifications of this scale. Review processes vary dramatically—some jurisdictions approve within two days, others take three weeks or longer. Skipping permits carries serious consequences: failed home inspections, denied insurance claims, potential removal orders, and reduced property value.
Electrician scheduling has become increasingly challenging in 2026. Qualified professionals book 2-6 weeks out in high-demand areas. Peak seasons following major EV sales events create even longer wait times. Early scheduling is essential for realistic project timelines.
Location decisions impact daily charging satisfaction. Your chosen spot must accommodate cable reach to your vehicle without creating tripping hazards, provide weather protection for outdoor installations, and allow convenient parking alignment. Poor placement leads to frustrating daily experiences that sour the entire EV ownership journey.
| Installation Factor | Why It Matters | Typical Impact |
|---|---|---|
| Panel Capacity | Determines if upgrades are necessary | $1,500+ additional costs and 1-2 week delays |
| Permitting | Required for legal compliance and insurance | 3-21 day approval timelines; fines if ignored |
| Electrician Availability | High demand in 2026 creates scheduling bottlenecks | 2-6 week wait periods in busy regions |
| Wiring Distance | Affects material costs and labor hours | $500-$1,500 extra for runs over 50 feet |
| Weather Protection | Critical for outdoor charger longevity | Prevents $400-$800 early equipment failure |
Bullet points for pre-installation preparation:
- Locate and photograph your main electrical panel, noting the amperage rating and available breaker spaces
- Visit your city or county building department website to download permit application forms
- Contact at least three licensed electricians for availability quotes—schedule the earliest possible assessment
- Measure the distance from your electrical panel to your preferred parking spot, accounting for path obstacles
- Check your vehicle’s onboard charger specifications to determine maximum supported charging speed
Early planning creates dramatic advantages. One fleet operator I advised saved over $3,000 and three weeks by completing electrical work ahead of charger delivery. These preparation principles apply equally to single-home installations.
Level 2 Home EV Charger Installation Mistakes That Add Thousands to Your Costs
Cost overruns during Level 2 home EV charger installation almost always trace back to specific, avoidable decisions. Understanding these common pitfalls before you start saves significant money and frustration.
The most expensive Level 2 EV charger installation mistakes include skipping professional electrical assessment, selecting incorrect power ratings, circumventing permit requirements, and failing to plan for future electrical needs. Each error compounds project costs and introduces serious safety risks.
Bypassing the electrician assessment tops the list of costly errors. Many homeowners purchase a charger first, only to discover their panel lacks capacity or their vehicle doesn’t support the charger’s output. This forces expensive returns, restocking fees, and emergency electrical work. The correct sequence is assessment first, equipment purchase second.
Choosing charger power without verifying your vehicle’s onboard acceptance wastes money outright. A 22kW unit delivers no additional speed if your EV only accepts 11kW. Match charger output to your vehicle’s specifications and your daily driving needs—most drivers don’t require maximum charging speeds. Understanding the factors that affect charging speed helps you make an informed decision.
Permit avoidance creates cascading problems. Unpermitted work typically fails inspections, requiring rework and additional fees. Insurance companies frequently deny claims stemming from unpermitted electrical modifications. Some jurisdictions impose penalties up to $5,000 for unapproved electrical work discovered during home sales.
Failure to plan for expansion restricts future options. A single-vehicle setup today may not accommodate a second EV next year. Basic chargers lack load management capabilities for solar integration or time-of-use optimization. These oversights necessitate costly replacement rather than simple upgrades.
Mistake #1: Skipping Assessment
Incompatible equipment, wasted purchases, and dangerous conditions. Always hire an electrician for a site visit before buying anything.
Mistake #2: Wrong Power Rating
No speed benefit despite higher equipment costs. Match your charger to your vehicle’s onboard capacity and actual driving habits.
Mistake #3: Ignoring Permits
Legal violations, inspection failures, and insurance claim denials. Submit permit applications before any work begins.
Mistake #4: No Future Planning
Costly upgrades for second vehicles or solar integration. Choose scalable solutions with load management capabilities.
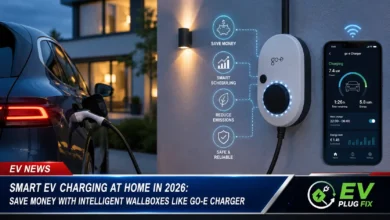
Smart charger features prevent many of these issues. Modern units include load management that automatically adjusts charging power based on home consumption, avoiding panel upgrades in many cases. Scheduling capabilities help you charge during off-peak hours, reducing electricity costs by up to 40%. Using time-of-use electricity plans can significantly lower your charging costs.
Location flexibility during planning helps you find the optimal charger placement. Consider parking orientation, cable path obstacles, and potential future vehicle positions. Documenting all installation steps creates valuable records for warranty claims and property documentation.
Complete Step-by-Step Level 2 Home EV Charger Installation Process for 2026
This Level 2 home EV charger installation roadmap guides you through every essential phase. Following this sequence ensures your installation proceeds smoothly from start to power-on.
Your 2026 Level 2 EV charger installation follows six critical steps: comprehensive home electrical assessment, informed charger selection, formal permit application, site preparation, professional installation, and thorough system testing. Most homeowners complete this process in three to four weeks when executed efficiently.
Step one: electrical assessment. Schedule a licensed electrician for a comprehensive site evaluation. They’ll perform detailed load calculations, inspect wiring condition, and identify any necessary upgrades. This crucial phase typically completes within one to three days and provides the foundation for all subsequent decisions.
Step two: charger selection. Based on your electrician’s assessment, choose a charger matching your vehicle’s capabilities and home capacity. Consider power output, smart features, mounting type, weather resistance, and safety certifications. Products with strong warranties and established manufacturer support reduce long-term risk. Browse our guide to the best home EV wallbox chargers for residential garages.
Step three: permit application. Prepare and submit your charger installation plans to the local building department. Your electrician typically provides the necessary electrical diagrams. Approval timelines range from a few days to several weeks, so start this process early in your project timeline.
Step four: site preparation. This involves running wiring from the panel to the charger location, installing conduit as needed, and mounting the charger bracket. Professional electricians perform this work to meet rigorous National Electrical Code requirements and local amendments.
Step five: professional installation. The electrician connects the dedicated circuit, installs the appropriate breaker, and securely mounts the charger unit. Standard installations typically complete within a single day once all preparatory work is finished.
Step six: testing and activation. Verify voltage levels, proper grounding, and vehicle communication. Test charging sessions under various conditions and monitor performance metrics. Confirm that all smart features function correctly and schedule your first full charge cycle.
| Installation Phase | Typical Duration | Key Activities | Who Handles It |
|---|---|---|---|
| Electrical Assessment | 1-3 days | Panel inspection, load calculation, capacity analysis | Licensed Electrician |
| Charger Selection | 1-7 days | Research, specification matching, equipment purchase | Homeowner |
| Permit Application | 3-21 days | Documentation submission, plan review, fee payment | Electrician/Homeowner |
| Site Preparation | 1-3 days | Wiring routing, conduit installation, bracket mounting | Licensed Electrician |
| Charger Installation | 1 day | Circuit connection, breaker installation, unit mounting | Licensed Electrician |
| Testing & Activation | 1 day | Voltage verification, charging session testing, system configuration | Electrician/Homeowner |
Pro tips for smooth Level 2 home EV charger installation execution:
- Maintain a dedicated project folder with all quotes, permits, equipment documents, and inspection records
- Build buffer time between phases—electricians run late, permits sometimes delay
- Schedule regular communication check-ins with your electrician to prevent surprises
- Test thoroughly in varied conditions: cold mornings, hot afternoons, after rain for outdoor units
- Take photographs throughout the installation for your records
Location finalization happens during the site preparation phase. Consider the vehicle approach angle, cable management paths, and weather protection requirements. Indoor installations offer natural protection, while outdoor units require appropriate NEMA ratings.
Testing should include multiple charging sessions monitoring temperature, speed consistency, and system stability. Adjust settings based on your driving patterns and energy costs.
Key Components of Successful Level 2 EV Charger Installation in 2026
Success extends beyond getting power to your vehicle. A properly executed Level 2 home EV charger installation delivers years of reliable, cost-effective charging with minimal maintenance.
Successful installations combine professional code-compliant installation, smart charger capabilities with load management, optimal location planning, and solar integration readiness. These elements deliver convenience, energy efficiency, and future expansion capacity.
Professional installation remains non-negotiable for safety and warranty protection. Licensed electricians ensure proper grounding, correct wire sizing, and all connections meet current National Electrical Code standards. This expertise prevents fire hazards, protects your equipment warranty, and provides documentation for home inspections.
Smart charging features dramatically improve user experience. Mobile app control, charging schedule customization, energy consumption monitoring, and time-of-use optimization help you minimize electricity costs. Load management technology is particularly valuable—it automatically adjusts charging power based on your home’s overall consumption, preventing circuit overloads without requiring panel upgrades. Modern EV charging apps give you complete control over your charging sessions from your smartphone.
Optimal charger placement affects daily satisfaction more than most realize. Easy vehicle access, protection from weather and physical damage, and short cable paths reduce wear and eliminate daily frustration. Good cable management prevents tripping hazards and prolongs equipment life.
Solar integration prepares your home for future energy independence. Chargers compatible with solar systems and home battery storage can reduce charging costs by 70-90% as renewable energy adoption increases. Investing in this capability now saves money later.
| Success Factor | Basic Implementation | Optimal Implementation | Long-Term Benefit |
|---|---|---|---|
| Installation Quality | DIY or general handyman | Licensed professional electrician | Safety assurance, code compliance, warranty protection |
| Charger Technology | Basic non-communicating unit | Smart charger with load management and scheduling | 40% energy cost savings, panel upgrade avoidance |
| Mounting Location | Nearest available wall spot | Optimized for vehicle access and cable protection | Daily convenience and equipment longevity |
| Future Readiness | Current EV only | Solar compatible, second EV capable | Scalable infrastructure, home value increase |
Essential success checklist:
- Select chargers with strong user ratings and responsive manufacturer support
- Verify all equipment carries appropriate UL, ETL, or CSA certifications
- Plan cable routes to eliminate tripping hazards and potential damage
- Implement a monthly visual inspection routine for cable and connector wear
- Maintain accessible records of installation documentation
Load management technology has evolved significantly in 2026. Modern systems dynamically balance power across your home’s circuits, preventing overloads and eliminating expensive panel upgrades in many cases. This technology often pays for itself within the first year.
Solar-ready charging stations are gaining popularity. They maximize renewable energy benefits by prioritizing solar power when available and switching to grid power when needed. This capability reduces charging costs and environmental impact. For more information on advanced charging features, explore our guide to Plug and Charge technology for seamless authentication.
Your Level 2 Home EV Charger Installation Action Plan
You’ve gathered the information needed to begin your Level 2 home EV charger installation. Taking action starts today with specific, manageable steps.
Your immediate action plan: contact your utility provider for installation guidance, schedule an electrician assessment within the next week, research charger specifications matching your vehicle, and establish a realistic project timeline. Each step builds momentum toward convenient home charging.
Begin by contacting your local utility company. Many offer home EV charger installation guidance, rebate programs, and time-of-use rate plans that reduce charging costs. Some utilities even provide discounted equipment or free electrical assessments.
Schedule your electrician site assessment promptly. Professional availability is limited in 2026—early scheduling prevents frustrating delays. Prepare your electrician with specific questions about panel capacity, permit requirements, and potential upgrade costs.
Research charger options thoroughly. Compare 2-3 models that match your electrician’s recommendations and vehicle specifications. Prioritize features that align with your driving patterns and long-term plans.
Develop your project timeline with appropriate buffer days. Share your schedule with all stakeholders—electrician, permit office, your family—to coordinate schedules effectively.
| Action Step | Target Week | Responsible Party | Expected Outcome |
|---|---|---|---|
| Contact Utility Provider | Week 1 | You | Rebate info, rate plan details, assessment resources |
| Electrician Assessment | Week 1-2 | Licensed Electrician | Panel capacity report, upgrade recommendations |
| Charger Selection | Week 1 | You | Equipment specification, purchase order |
| Permit Application | Week 2 | Electrician helps you | Approved permit for installation |
| Charger Installation | Week 3-4 | Professional Team | Complete mounted and wired system |
| Final Testing | Week 4 | You and Electrician | Fully operational charging station |
Quick progress tips:
- Create a digital folder for all project documents: quotes, permits, equipment receipts, warranty info
- Set weekly calendar reminders to track project milestones and follow-ups
- Connect with local EV owner groups for firsthand installation experiences and electrician referrals
- Prepare a backup charging plan (public stations, portable chargers) during installation
Review your daily and weekly schedule to identify optimal installation timing. Coordinating with your household members ensures everyone is prepared for access disruptions during the work.
Frequently Asked Questions About Level 2 Home EV Charger Installation
How long does Level 2 home EV charger installation take?
Most Level 2 home EV charger installation projects complete in 1-4 weeks from initial assessment to final testing. This timeline includes the electrical evaluation, permit processing, equipment delivery, and installation work. Simple installations with adequate panel capacity sometimes finish within one week.
Do I need a professional electrician for Level 2 charger installation?
Yes, professional installation is strongly recommended for all Level 2 home EV charger installations. Licensed electricians ensure code compliance, proper grounding, and correct circuit sizing. Professional installation protects your equipment warranty, home insurance coverage, and personal safety. Most manufacturers require professional installation for warranty validity.
What permits are required for home EV charger installation?
Electrical permits from your local building department are typically mandatory for Level 2 home EV charger installation. The permit application requires electrical diagrams and load calculations, which your electrician provides. Permit fees range from $50 to $500 depending on your jurisdiction.
Can I install a Level 2 charger myself?
While technically possible for experienced DIYers, professional installation is strongly recommended. Level 2 chargers require 240-volt circuits carrying significant current—mistakes create fire hazards and electrical shock risks. Many insurance policies won’t cover DIY electrical work. Save money elsewhere; invest in professional installation for safety and peace of mind.
How much does typical home EV charger installation cost in 2026?
Expect total Level 2 home EV charger installation costs from $800 to $3,500 in 2026. This range includes equipment, materials, labor, and permit fees. Variables include panel upgrade needs, wiring distance, charger features, and local labor rates. Get multiple quotes and account for potential panel upgrades in your budget.
Should I install now or wait for better technology?
Install now for immediate charging convenience and fuel cost savings. Current Level 2 EV charger technology delivers excellent performance and reliability. Basic infrastructure—panel capacity, wiring, permit approvals—remains valid for future upgrades. Installing now eliminates range anxiety and reduces gasoline costs while technology improvements continue. To learn more about how smart charging can optimize your energy usage, check out our article on home charging efficiency and loss.